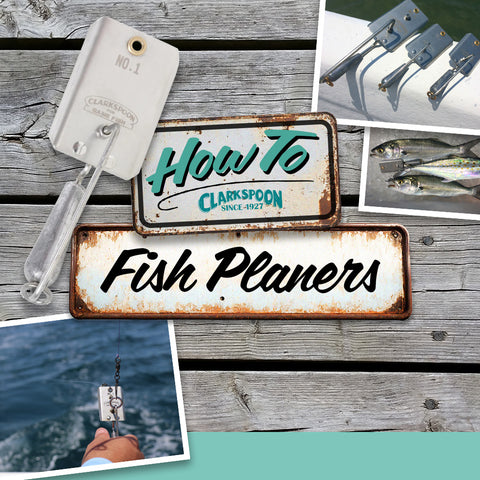

Why Should You Use a Planer?
Diving Planers take your lure down below the surface to where the fish are feeding and return to the surface after a fish strikes. Different size planers allow you to achieve increasingly greater depths as you go up in size.
Planers are designed to run at an approximate angle of 45 degrees. At this angle, the planer will dive one foot for each two feet of planer line that is below the surface of the water.


What trolling speed should be used with my planer?
Optimum trolling speed is usually between 4 to 6 miles per hour or 1000 and 1500 rpm.
Vary speeds within this range until you establish your most effective reading!

What helps a planer dive deeper?
Planer Blade Size
A larger blade allows the planer to run deeper in the water. High-speed planers have a unique design that helps them dive deeper even at faster trolling speeds.
Lead Weight on the Planer Wire
The amount of lead on the wire will only slightly influence depth. It’s the planer blade that achieves the planing function.
Type and Quality of Fishing Line
The type and quality of line used to pull the planer has a major impact on its diving ability:
- Strength matters: The line must be strong enough to hold the planer and withstand the force of fighting fish.
- Diameter affects depth: Thicker lines create more drag, reducing how deep the planer can go.
- Longer lines help: Extending the planer line generally increases depth, but only up to a certain point.


Choosing the Right Planer Line
The type of line you use can significantly impact your fishing success.
1. Braided Fishing Line
- Braid has low stretch, high strength-to-small diameter ratio for a consistent, deep, and stable troll.
- Braid's non-stretch tension on the planer helps it dive deeper to achieve maximum depth.
2. Monofilament Fishing Line
- Monofilament works well for moderate depth trolling and is easier to handle than braid.
3. Handline (small nylon cord)
- A handline works well when depth is not a major factor.
- One end of the handline is attached to the boat (often with a loop around a cleat), and the other is either tied or connected with a large snap swivel to the planer rig.
Different Setups for Your Planer


Time to Fish! Here’s How to Fish Your Planer.
Now that we understand how planers work and the factors that affect their ability to dive, it is time to catch some fish. There are a few simple guidelines that will make using planers both easier and more productive:
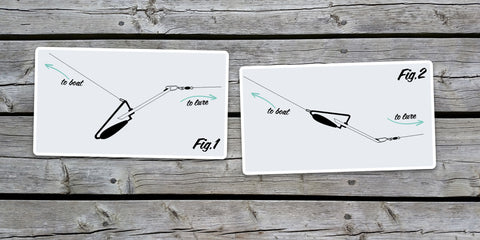
1. In order to dive, a planer must be in the “set” position (fig. 1 above).
Usually, a planer will set itself upon entering the water. Sometimes it doesn’t or a fish may strike and "trip" the planer without getting hooked (fig. 2 above).
In these instances, it is helpful to be able to reset the planer without reeling it all the way to the boat. Pull in several feet of line and then quickly release it. This slack in the planer line will allow the weight on the planer to nose dive and the planer reset itself. If this doesn’t work after an attempt or two, slow the boat speed and repeat the procedure. This same procedure can be used if the planer should hit bottom and trip.
2. If the planer is not running straight it has probably gotten bent and needs to have the blade straightened or the wire aligned. It is a common occurrence for the planer to be stepped on in the excitement of landing a fish and a pair of pliers is generally all that it takes to put the planer back into working order.
3. Planer size must be matched to lure size. A lure that is too large for the planer will create enough drag to repeatedly trip the planer. The only solutions are to go to a larger planer or a smaller lure. On the other hand, small fish will often not trip a large planer and a smaller planer may be required.
4. When a planer that has been running straight suddenly starts tracking at an angle, it is likely that a small fish is on the line or that the planer has picked up seaweed or other debris. In either event, the planer needs to be pulled and checked.
5. Planers create more turbulence in the water than trolling sinkers, because of this longer than normal leaders will greatly improve planer productivity. A minimum of 20 ft. should be used on the smaller planers, and 40 to 50 ft. will work best on larger sizes. If the water is unusually clear, even longer leaders will add to your catch.
In addition to line diameter, there are other factors that determine the maximum depth such as, line type, trolling speed, current, lure drag, lure weight, water temperature, and length of line. Therefore each planer may have a wide range of possible depths that can be achieved.
A #1 planer and #2 planer can be used with most trolling rods. A #3 planer would need to be used with a heavier trolling rod. Any planer larger than a #3 should be used with a handline or specifically designed planer rod.
* NOTE: All objects immersed in water are subject to a buoyant force that is proportional to the volume of water displaced; therefore, if enough planer line was let out, the combination of the buoyant force from the water displacement with the water pressure on the line and blade would eventually reach a point where the upward pressure would offset the diving capability of the planer. This buoyant force is one of the primary reasons that the depth attained does not remain proportional to the amount of line let out.

How to Set and Retrieve Your Planers
Once you’ve selected the right planer and line, knowing how to use it correctly is essential for successful trolling.
Setting Up Your Planer
- Attach the snap swivel from the planer line to the brass ring on the planer.
- Ease the planer into the water at a 45-degree angle.
- The planer should automatically enter the “set” position. If it doesn’t, try pulling in several feet of line and quickly releasing it.
- If the planer still won’t reset, slow the boat slightly and repeat the process.
Retrieving a Planer Without Stopping the Boat
- To trip a planer while trolling, pull in several feet of line and quickly release it.
- Larger planers may require more force to trip, depending on the boat speed.
Troubleshooting Planer Issues
- Planer tracking to the side? The blade may be bent. Use pliers to straighten it.
- Planer suddenly running at an angle? This could mean a small fish is on the line or debris (like seaweed) is stuck to it. Pull it in and check.
- Planer repeatedly tripping? Your lure might be too large for the planer. Use a smaller lure or a larger planer.
How to Rig a Planer & Clarkspoon
Grab Your Planer & Fish On!
Using the right planer, line, and trolling techniques will help you reach the desired depth and maximize your chances of catching fish. Experiment with different setups based on conditions, and adjust your approach as needed for the best results.
We hope that this brief guide will add to your understanding of planers with the result of enjoyable and successful fishing adventures!
Extra Tips From Clark
- The clearer the water, the longer the leader.
- The larger the sinker or planer, the longer the leader.
- Use a ball bearing snap swivel attached to the sinker or planer – never to the lure.
- The old adage “large bait – large fish” often holds true. However, it is generally more important to match the size of the bait on which the fish are feeding, particularly when fishing for Spanish mackerel.
- Fish not biting, water clear. Try a smaller spoon and/or a gold spoon. Vary your trolling speed, but a faster speed is more likely to be productive.
- Fish not biting, water cloudy or dirty. Try a larger spoon and a slower trolling speed. Also, the water may be clearer at a greater depth, so try a larger sinker or planer. If possible, move offshore to clearer water. A transition line between dirty and clear water is often loaded with fish.
We would like to extend a special thanks to Art Levey and Capt. Jerry Dilsaver for their contribution in creating this content.